
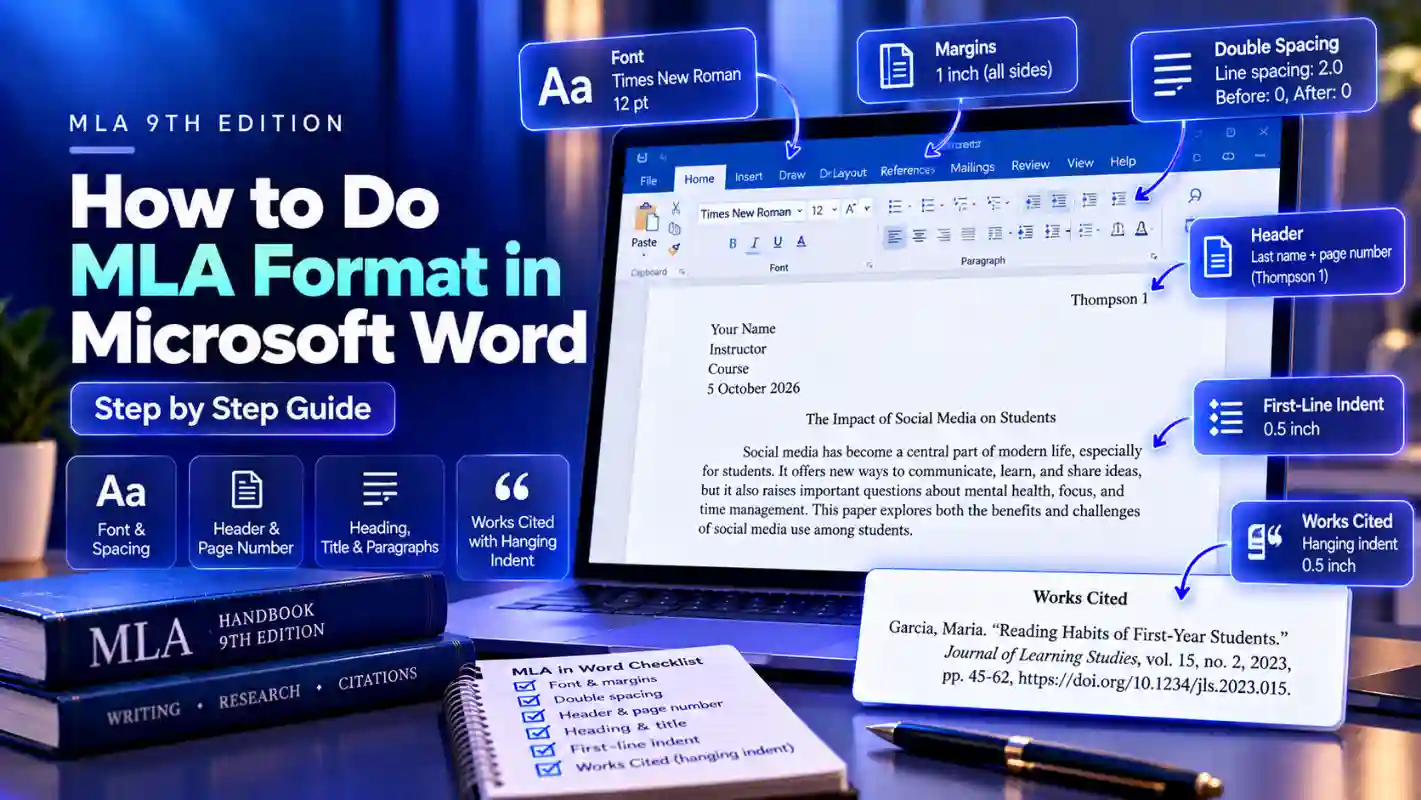
Microsoft Word can handle every MLA requirement, but a few of its defaults quietly break the rules. A new Word document adds extra space after each paragraph, uses 1.08 line spacing instead of double, and may start in a font other than the one your instructor expects. Fix those once, add a header and a Works Cited page, and your paper is ready.
These steps follow the MLA Handbook, 9th edition, and match Word for Microsoft 365 on Windows. On a Mac, use Cmd instead of Ctrl, and look for paragraph settings under Format, Paragraph. Prefer Google Docs? See MLA format in Google Docs.
MLA Settings and Where They Live in Word
| MLA Requirement | Word Setting | Ribbon Location |
|---|---|---|
| Readable font, 11 to 13 pt | Times New Roman, 12 pt | Home, Font group |
| 1-inch margins | Normal margins | Layout, Margins |
| Double spacing | Line spacing 2.0, 0 pt before and after | Home, Paragraph dialog |
| Running head | Last name and page number, top right | Insert, Page Number |
| First-line indent | 0.5 inch | Home, Paragraph dialog, Special |
| Works Cited indent | Hanging, 0.5 inch | Home, Paragraph dialog, Special |
The Paragraph dialog opens from the small arrow in the bottom right corner of the Paragraph group on the Home tab.
Step 1: Set Font and Spacing Through the Normal Style
Changing the Normal style, instead of formatting text by hand, makes every paragraph you type follow MLA automatically.
- On the Home tab, right-click Normal in the Styles gallery and choose Modify.
- Set the font to Times New Roman and the size to 12.
- Click Format in the bottom left, then Paragraph.
- Under Spacing, set Before and After to 0 pt and Line spacing to Double. Click OK.
- Choose New documents based on this template if you want every future document to start in MLA format, then click OK.
- Go to Layout, Margins, and confirm Normal is selected, which gives 1 inch on every side.
If you already typed some text, select it with Ctrl + A and click Normal in the Styles gallery so it picks up the new settings.
Step 2: Insert the Running Head
MLA wants your last name and the page number in the top right corner of every page.
- Go to Insert, Page Number, Top of Page, and pick Plain Number 3, the right-aligned option.
- With the cursor before the number, type your last name and one space, so it reads Thompson 1.
- On the Header & Footer tab, make sure Different First Page is unchecked.
- Set Header from Top to 0.5 inch.
- Select the header text and match its font and size to your essay.
- Click Close Header and Footer, or double-click the body of the page.
Word numbers the pages for you from here on, including the Works Cited page.
Step 3: Add the Heading, Title, and Paragraph Indents
Work in the main body of page one, not in the header area.
- Heading: at the left margin, type four lines: your name, your instructor, the course, and the date, such as 12 March 2025.
- Title: press Enter, then Ctrl + E to center it. Use title case and keep it plain: no bold, underline, italics, or quotation marks.
- Back to the left: press Enter, then Ctrl + L.
- First-line indent: open the Paragraph dialog, choose First line under Special, and set By to 0.5 inch. Every new paragraph will indent on its own.
Word's AutoCorrect sometimes capitalizes words or turns a typed dash into a symbol you did not want, so reread the heading lines once.
The MLA Heading & Header Generator gives you all four lines ready to paste.
Step 4: Build the Works Cited Page
Word has two advantages here: a one-key hanging indent and a built-in sort.
- New page: at the end of your essay, press Ctrl + Enter to insert a page break.
- Title: center the words Works Cited at the top, with no bold or italics.
- Entries: press Enter, return to the left margin with Ctrl + L, and paste your citations. Remove the first-line indent from these lines if Word carried it over.
- Hanging indent: select all entries and press Ctrl + T, or open the Paragraph dialog and choose Hanging under Special, set to 0.5 inch.
- Alphabetize: with the entries still selected, go to Home and click the Sort button (A to Z). Sort by Paragraphs, Text, Ascending, then click OK.
To paste citations without bringing in another site's fonts, right-click and choose Keep Text Only, then reapply italics to titles.
Word's Citation Tool and Templates: Worth Using?
Word offers shortcuts, but each has a catch.
| Shortcut | What It Does | The Catch |
|---|---|---|
| References tab, Citations & Bibliography | Stores sources and inserts in-text citations and a bibliography | The MLA option is labeled with an older edition in many Word versions, so entries can miss MLA 9 details such as https://doi.org/ DOIs — see MLA 8 vs MLA 9 |
| File, New, search “MLA” | Opens an MLA-style paper template with placeholder text | Check the font, spacing, and header against this guide before writing |
| Your own .dotx template | Save a formatted blank paper with File, Save As, Word Template | You set it up once, and it stays correct for every paper |
| MLA Format Generator | Builds MLA 9 citations and exports a formatted Word file | Review names and titles you typed before submitting |
Whatever you use, check the style label. If Word's citation tool does not say ninth edition, compare a few entries with an MLA 9 example before you trust the rest.
Fixing Common Word Problems
| Problem | Why It Happens | Fix |
|---|---|---|
| Gaps between paragraphs | Word adds 8 pt after paragraphs by default | Paragraph dialog, set After to 0 pt |
| Spacing looks slightly off | Line spacing is 1.08 or Multiple | Set Line spacing to Double |
| No number on page one | Different First Page is checked | Header & Footer tab, uncheck it |
| Header font differs from essay | The Header style keeps its own font | Select the header and change the font |
| Heading lines indented | First-line indent applied to the heading | Select the heading and set Special to None |
| Sort scrambled the entries | Some entries are split into extra paragraphs | Join each entry into one paragraph, then sort again |
Ready to build your citation?
Try the free Works Cited Generator